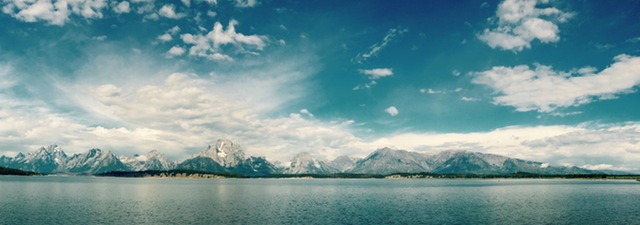
Sometimes, the scenes that take our breath away are simply too large to fit inside a 3:2 photograph. Panoramic photography allows us to capture those scenes without the constraints of traditional aspect ratios. But, since the camera’s sensor still uses that traditional aspect ratio, panoramas are made from several images stitched together — which is where things start to get tricky. Understanding just how panoramic photography works can help you avoid the common pitfalls to shoot incredible wide scenes.
Pitfall # 1: Movement.
Panoramas are made from lining up multiple images, but if something moves in between those shots, those photos won’t line up. Always avoid movement in panoramic photography. While skipping over the obvious action is easy, motion comes into play in smaller ways too. On a windy day, the leaves on the trees may move, creating an odd stitch where the images meet. Waves cause similar issues. Waiting for a less windy day, or blurring all the movement by stringing multiple long exposure images together will often do the trick.
Pitfall # 2: Distortion.
Taking the images while standing in one place means you have to tilt your camera slightly as you take each subsequent image. That tilt movement distorts lines and objects, making them appear to bend. Moving your feet in a horizontal line to take each shot is sometimes a solution, but not all panorama modes work this way — and even stitching the images together by hand, not all scenes allow you enough range of movement to make it work. The trick? Keep everything distant to the camera. The closer objects are, the more they will appear to distort. That means avoiding foreground elements and standing back from your subject.
Pitfall # 3: Shooting in auto.
Panorama modes will keep each image’s exposure even between shots, but if you’re using a DSLR and an image editor to create a higher resolution image, you can (theoretically) shoot in any mode. The problem is that automated modes and even semi-automated modes like shutter priority may change the exposure settings between shots. That means manual mode is a must, or the panorama won’t stitch together well.
Not comfortable in manual mode yet? Turn your camera to aperture priority mode, then set your aperture — an f/8 or higher will help keep that wide view sharp. Then, look at the shutter speed and ISO that the camera selected for you. Turn to manual mode, then put those same settings in — and leave them put until all of the single shots for the panorama are finished.
Pitfall #4: Not enough overlap.
Matching up images is a complex process — software simplifies things, but you still need to shoot it right in the first place. Try to shoot each image with about a 30 percent overlap to leave some room for error. Make sure to also keep your camera horizontal; using a tripod is a big help.
Panoramic photography expand the possibilities outside the typical size of a photograph — but the larger the photo is, the more chances there are for errors. Recognize the most common panorama pitfalls before you shoot to increase your chances of nailing the wide shot.
