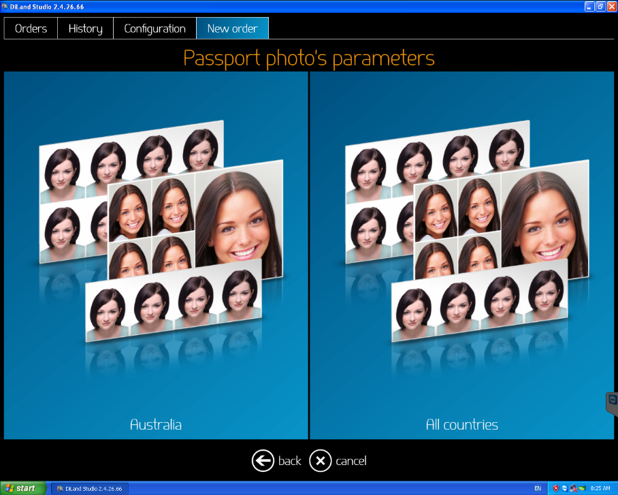
Using the international passport product on your photo kiosk software allows access to all international passport and visa sizes from a single-entry point and biometric requirements will be kept up to date.
Diland will show as default the country that is set in your PC’s language and regional settings in windows so if Australian is the most commonly used make sure your settings are on Australia.
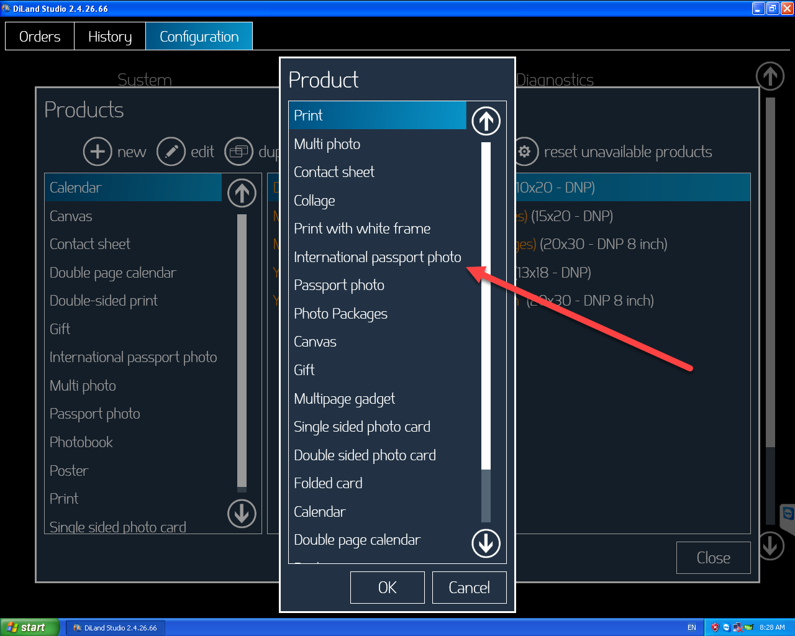
To start using international passport go to configuration / products / new / international passport.
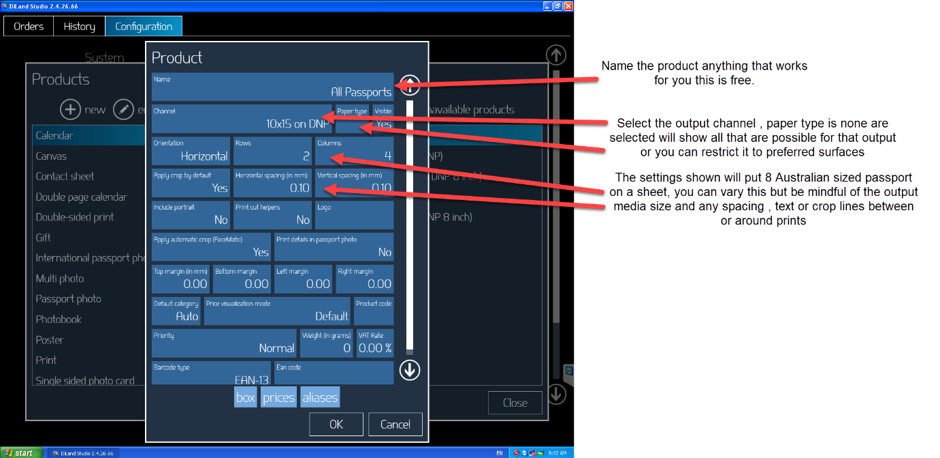
You can vary the default settings and customise to fit your needs, the settings below will give you a guide.
This example produces 8 Australian passport photos with no room for crop/cut lines, store logos or text. You could have fewer and add these items.
Also, the system will adjust the number of images based on the country, USA for example will produce 2 images as they are 50×50 and with margins etc don’t fit more.
Make sure the product is showing in categories, if not add it.
If you are making passports behind the counter ie. on Studio make sure under categories the product/category is not visible on kiosk.
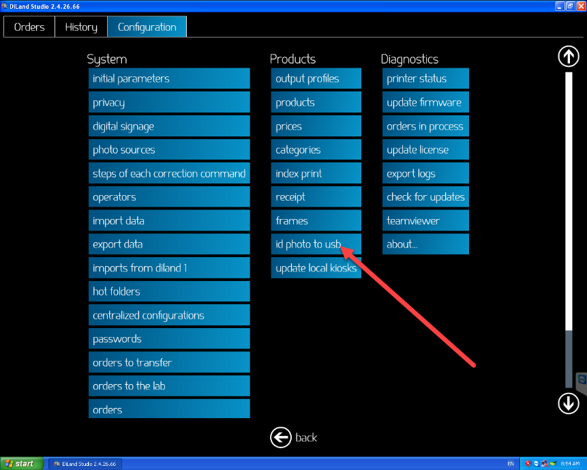
ID Photos to USB
You can also save the passport image (along with original) to USB, to do this simply turn on and add a price. You can then either give the USB to the customer or some stores use it to email. Generally, for a fee.


