Let’s look at getting a better understanding of our camera today and have a look at ‘Depth of Field’.
This is often mentioned in photography articles and often it is assumed that everyone already understands what Depth of Field is. So today we are going to set you a challenge and take some test photos at home to really get a grip in Depth of Field and how it changes the look of your photos.
Rather than go into in depth discussions of ‘hyperfocal focus distances’ and ‘apparent focus’ that often cloud our understanding of how using depth of field can change the way our images look, instead we are going to cover the absolute basics and then get out our cameras and ‘get shooting!’
Our friends at Wikipedia have a good brief description of Depth of Field that is pretty clear and easy to understand so here it is “the depth of field (DOF) is the portion of a scene that appears sharp in the image. Although a lens can precisely focus at only one distance, the decrease in sharpness is gradual on either side of the focused distance.” In other words, the amount of detail we can see in front and behind our subject, whether that be a lot of detail or only a little, is how much depth of field we have.
I have always found that if we replace the word ‘field’ with ‘focus’ then the whole thing starts to become clearer. After all it is the depth of the focus that we are talking about and I find it is a lot easier to remember that way so that’s what I’ll refer to it as from now on.
There is one easy rule to remember when it comes to controlling your Depth of Focus. The bigger the aperture number you use on your camera (such as f11 or f16) the MORE depth of focus you will have. The smaller the aperture number you use (such as f3.5 or f2.0) then the LESS depth of focus you will have.
The effect of Depth of Focus can be more pronounced with different types of lenses. The bigger the zoom lens you have on your camera, the more pronounced you can make the minimal depth of focus look, whereas if you are using the wide angle zoom lens that you got with your camera then it is harder to really blur out a background as a wider angle lens, because of its design, naturally keeps more of your image in focus than a bigger zoom will.
OK so when do we USE these in our photos?
The two most common subjects that photos are taken of are people and landscapes so let’s look at how we can use Depth of Focus to change how these two types of photos can look.
Firstly let’s look at Landscapes. Most commonly, when shooting landscapes, you want to show off as much detail as you can from the scene but sometimes you just want to highlight one aspect of the scene and blur out the rest to give the object more impact. So how do we do this?
 Firstly, for the big detailed landscape it is as easy as using a big enough aperture to ensure that as much as possible is in focus. So an aperture of f11, f16 or higher would be ideal. The one thing to keep in mind when using these big apertures though is that the camera has less light coming into it and therefore your shutter speed gets slower. This is fine when it is nice and bright out but not so good when the light is less than ideal. The solution? Use a tripod in these situations as you will always get a better photo when a tripod is used when you are using slower shutter speeds.
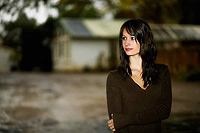
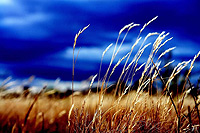
To isolate a subject in your photo then you need to use a small aperture like f2 or f3.5 – generally it is best to use the smallest number your lens will let you do. To really make this effect pop it is best if the subject you are looking to highlight is as close as possible to your lens. Have a look at our example shots of these techniques and it will give you a good idea of how your images will look using these techniques.
 When it comes to shooting People we can use the same concepts as above but it is far more common to want to blur out the background when shooting a portrait than it is in landscape photography. This is because we often have to shoot our people shots in uninteresting locations with ugly brick walls or other unsightly objects in the background.
 So to get the best looking portrait shots it can be as simple as setting you aperture to its smallest possible number and therefore blurring out at much of the scene that isn’t your subject as possible.
Sometimes you are lucky enough to be in an amazing location that you want to show off with the person in the scene. In situations like this it is simply a matter of using a nice big aperture again like f11 or f16.
The best way to get a really good understanding of Depth of Focus is to get out and shoot some shots with different apertures, and this is where our challenge comes in.
First up let’s try the Landscape challenge. Put your wide angle zoom lens on your camera and go out into the backyard or a nearby park. Put your lens on its smallest aperture and find a nice garden ornament, a flower or a object that catches your interest, preferably one which has a lot of space behind it. Move reasonably close to this object , focus on it and shoot. Now, without moving, change your aperture from its smallest number to its biggest number and take the same shot again.
Next let’s get some unsuspecting family member out into the garden with us and try doing the same two shots with them as your main subject. In this instance though, try zooming your lens in as far as you can and frame a nice head and shoulders shot. Now take your two shots.
Load these images onto your computer and have a look at how different these four photos look.
With your garden or park object you should find that with the small aperture the object stands out nicely from the background and, because it is the object most in focus, your eye is naturally drawn to it. Now have a look at the same image with the big aperture. Notice how much more of your background is identifiable. This can be a great thing is the scene is one you really like but if it is one you don’t want to see then you now have the skills to blur out the background.
Now let’s look at the portrait shots. Your shot taken with a small aperture should have a small Depth of Focus and therefore your subject really stands out well whereas the one with the larger aperture is less appealing because the background draws your attention away from the subject.
There you have it.
A couple of simple tricks to make your people and landscape shots really POP.
– By Glynn Lavender
www.creativephotoworkshops.webs.com
